

Are you new to the world of infrastructure automation? Feeling overwhelmed by the complexity of setting up and managing your infrastructure? Fear not! Terraform is here to simplify your journey. In this beginner's guide, we'll walk you through the process of installing Terraform on a Linux Ubuntu system and provide hands-on examples to kickstart your infrastructure automation journey.
Understanding Terraform
Before we dive into the installation process, let's demystify Terraform.
Terraform is a powerful tool used to create, manage, and version infrastructure as code. It enables you to define your infrastructure using simple, declarative configuration files, and then automatically provision and manage your infrastructure across various cloud providers and on-premises environments.
Installing Terraform on Linux Ubuntu
Let's get started with installing Terraform on your Linux Ubuntu system. Follow these step-by-step instructions:
1. Find the Version
Begin by determining the version of Terraform you want to install. You can find the latest version on the official Terraform website.
2. Download and Extract Terraform
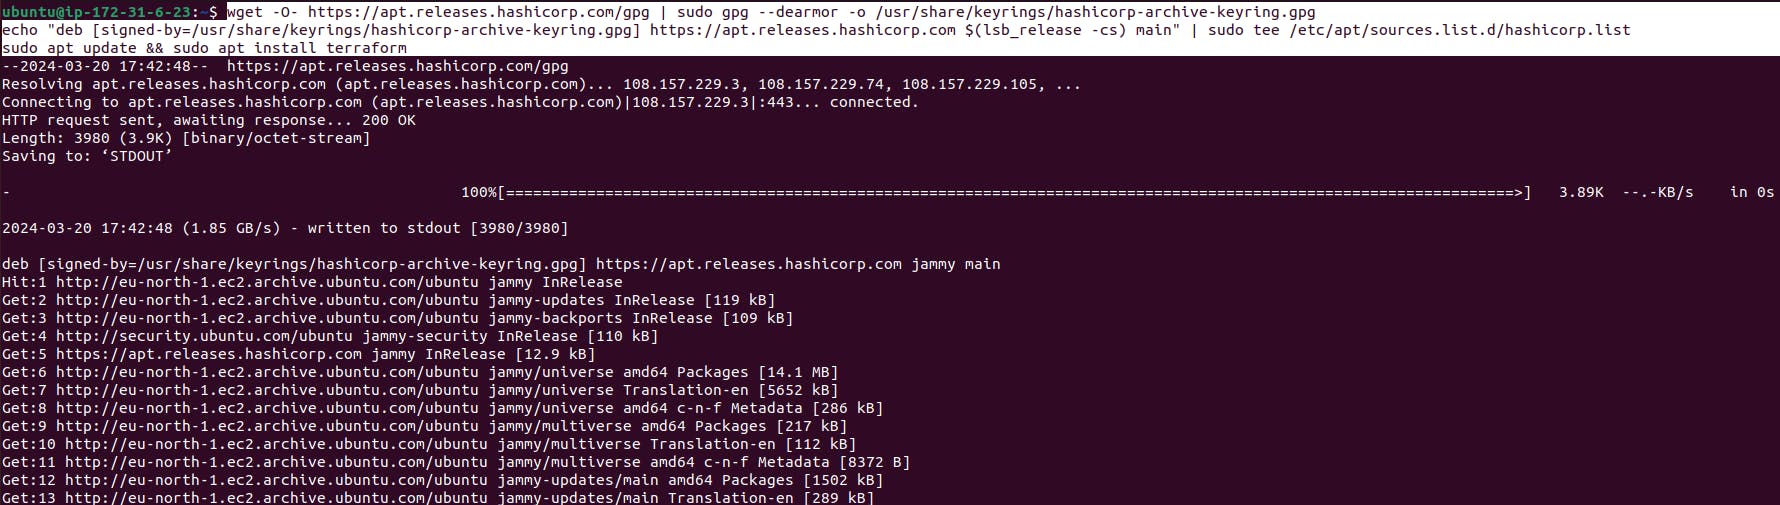
Open your terminal and execute the following commands to download and extract the Terraform binary:
wget -O- https://apt.releases.hashicorp.com/gpg | sudo gpg --dearmor -o /usr/share/keyrings/hashicorp-archive-keyring.gpg
echo "deb [signed-by=/usr/share/keyrings/hashicorp-archive-keyring.gpg] https://apt.releases.hashicorp.com $(lsb_release -cs) main" | sudo tee /etc/apt/sources.list.d/hashicorp.list
sudo apt update && sudo apt install terraform

3. Verify Installation
Verify that Terraform is installed correctly by checking the version:
terraform version

If successful, you should see the installed version of Terraform printed on the console.
Hands-on Examples with Terraform
Now that Terraform is installed, let's dive into some practical examples to showcase its capabilities.
mkdir terraform-practice
cd terraform-practice
Create and Automate a File with Terraform
Now, let's create a file named main.tf and use Terraform to automate its creation:
vim main.tf
Inside main.tf, add the following Terraform configuration to create a file named tws.txt with the specified content:
resource "local_file" "my_file" {
  filename = "tws.txt"
  content  = "This is a file created automatically by Terraform"
}
Save and exit the file by pressing Esc, then typing :wq, and pressing Enter.
To automate the creation of this file, follow these steps:
terraform init
terraform plan
terraform apply
After applying the configuration, you can verify that the file has been created by listing the contents of the directory:
ls
cat tws.txt


Automating Docker Environment Setup with Terraform
Terraform simplifies the process of setting up Docker environments through automation. Follow these steps to seamlessly integrate Docker into your infrastructure using Terraform:

Visit the Terraform Registry: Head over to the Terraform Registry website to explore available providers and modules for Docker.
Search for Docker Providers: Utilize the search functionality on the Terraform Registry website to find Docker providers. Type "docker" in the search bar and press Enter.
Select a Provider: Browse through the list of Docker providers available on the Terraform Registry. Choose the provider that aligns with your requirements for Docker automation.
View Usage Instructions: Click on the selected Docker provider to view its details and usage instructions. Review the documentation to understand how to integrate the provider into your Terraform configuration.
Copy Configuration Code: Copy the code snippet provided for configuring the Docker provider. This snippet typically includes the source URL and version information required for Terraform to fetch the provider.
Include Docker Provider in Terraform Configuration: Open your Terraform configuration file (e.g.,
terraform.tf) using a text editor. Paste the copied provider configuration code into your Terraform file under theterraformblock.terraform { required_providers { docker = { source = "Kreuzwerker/docker" version = "3.0.2" } } } provider "docker"{ # Add your Docker provider configuration options here }Replace
"Kreuzwerker/docker"with the source URL of the Docker provider you've selected from the Terraform Registry. Specify the desired version according to your requirements.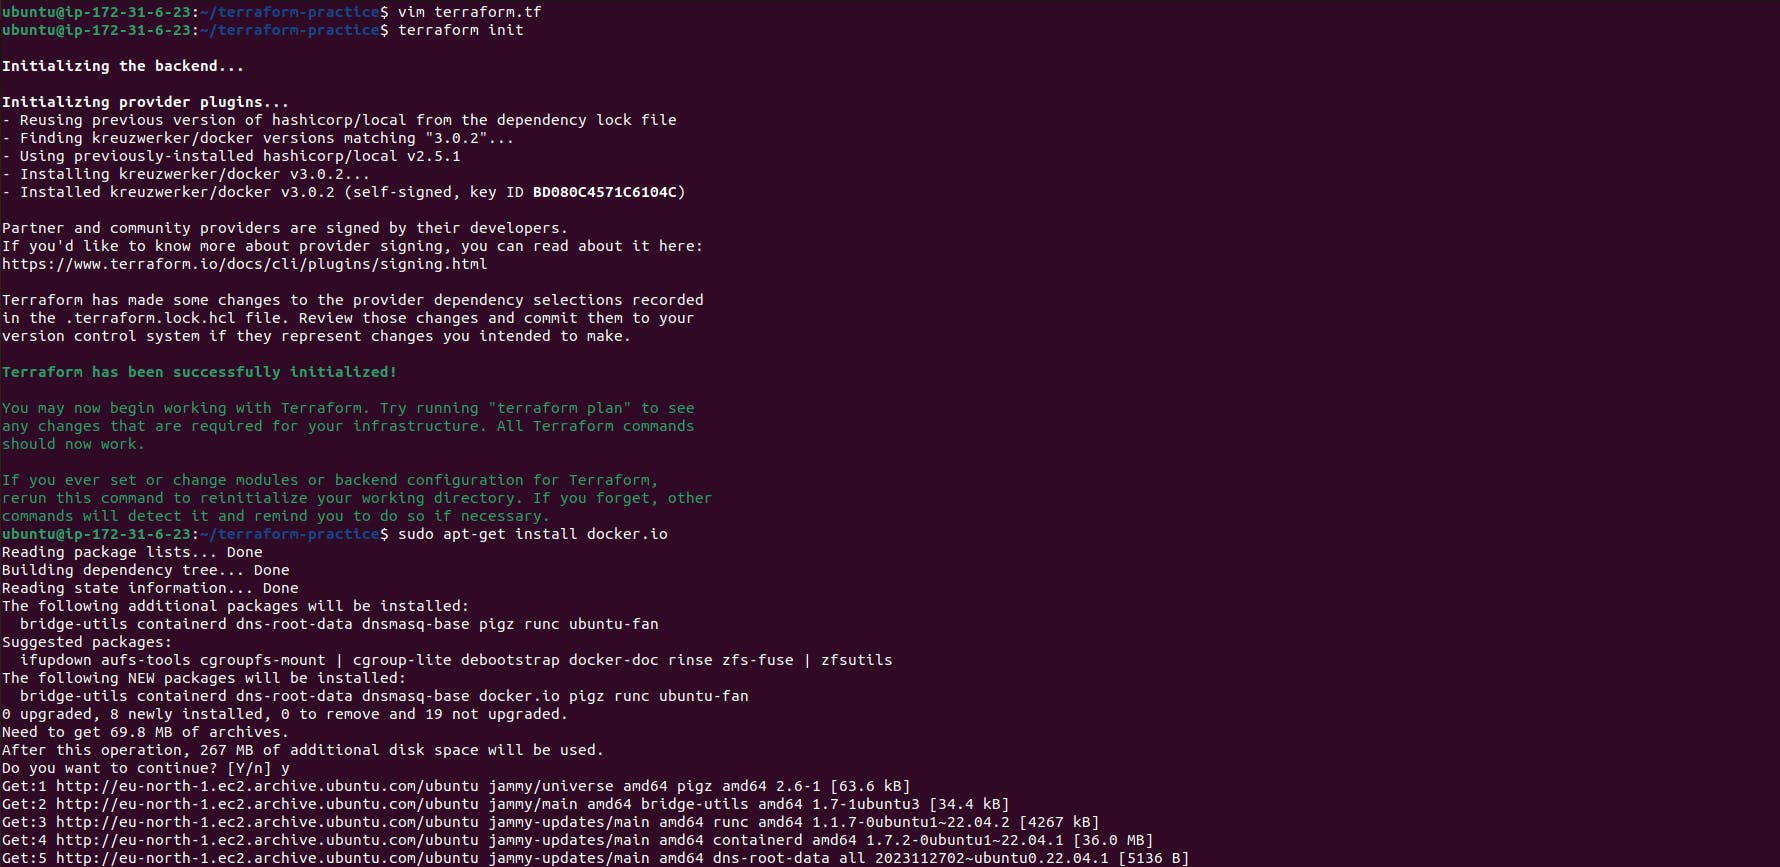
Initialize Terraform: Initialize Terraform to download the Docker provider plugin:
terraform initInstall Docker: Ensure Docker is installed on your system. If not, install Docker using the package manager:
 sudo apt-get update
 sudo apt-get install docker.io
 sudo chown $USER /var/run/docker.sock
Define Docker Resources: Create a new Terraform configuration file (e.g.,
docker_project.tf) to define Docker resources. In this example, we'll create a Docker image and container:
vim docker_project.tf
Inside docker_project.tf, define Docker image and container resources:
resource "docker_image" "my-image" {
  name         = "trainwithshubham/node-app-batch-6:latest"
  keep_locally = false
}

resource "docker_container" "my_container" {
  image = "trainwithshubham/node-app-batch-6:latest"
  keep_locally = false
}

resource "docker_container" "my_container" {
  image = docker_image.my_image.name
  name  = "node-app"
  ports {
    internal = 8000
    external = 8000
  }
  depends_on = [docker_image.my_image]
}
Apply Terraform Configuration: Apply the Terraform configuration to create Docker resources:
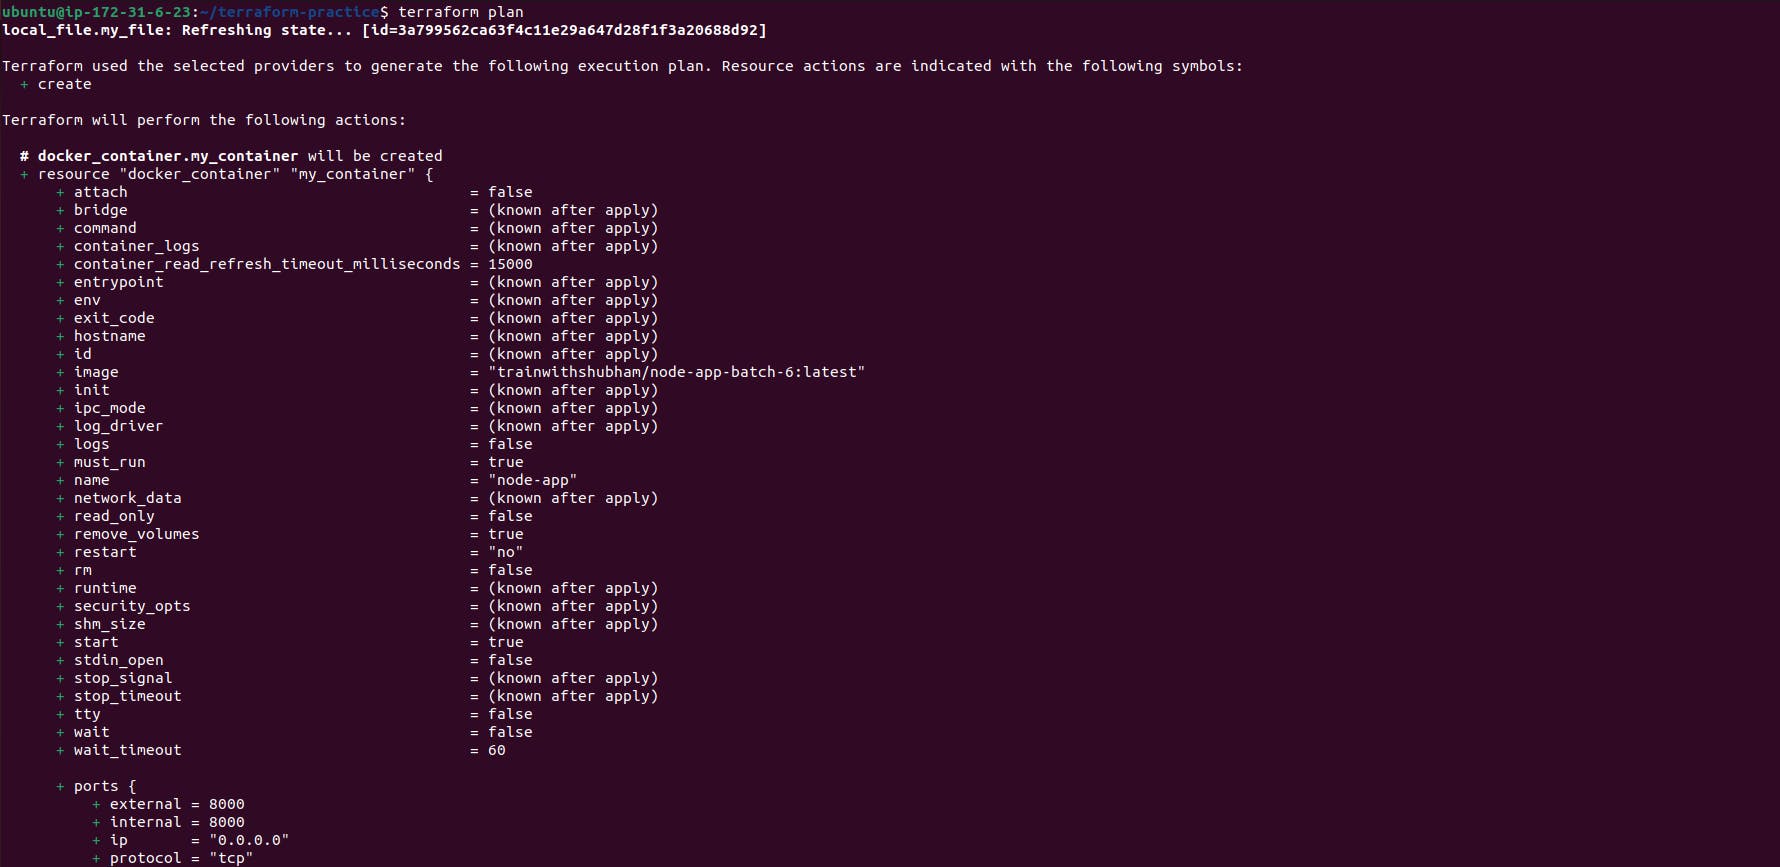
terraform plan
terraform apply
Verify Docker Environment: After applying the configuration, check the status of Docker containers:
docker ps
Access Application: Access the application running in the Docker container via its assigned IP address and port:

ip:8000
You should now see the application up and running in your Docker environment.

By following these steps, you've automated the setup of a Docker environment using Terraform, making it easier to manage and deploy containers in your infrastructure.
Destroy Docker Environment: Once you're done with the Docker environment, you can destroy it to release resources:
terraform destroy

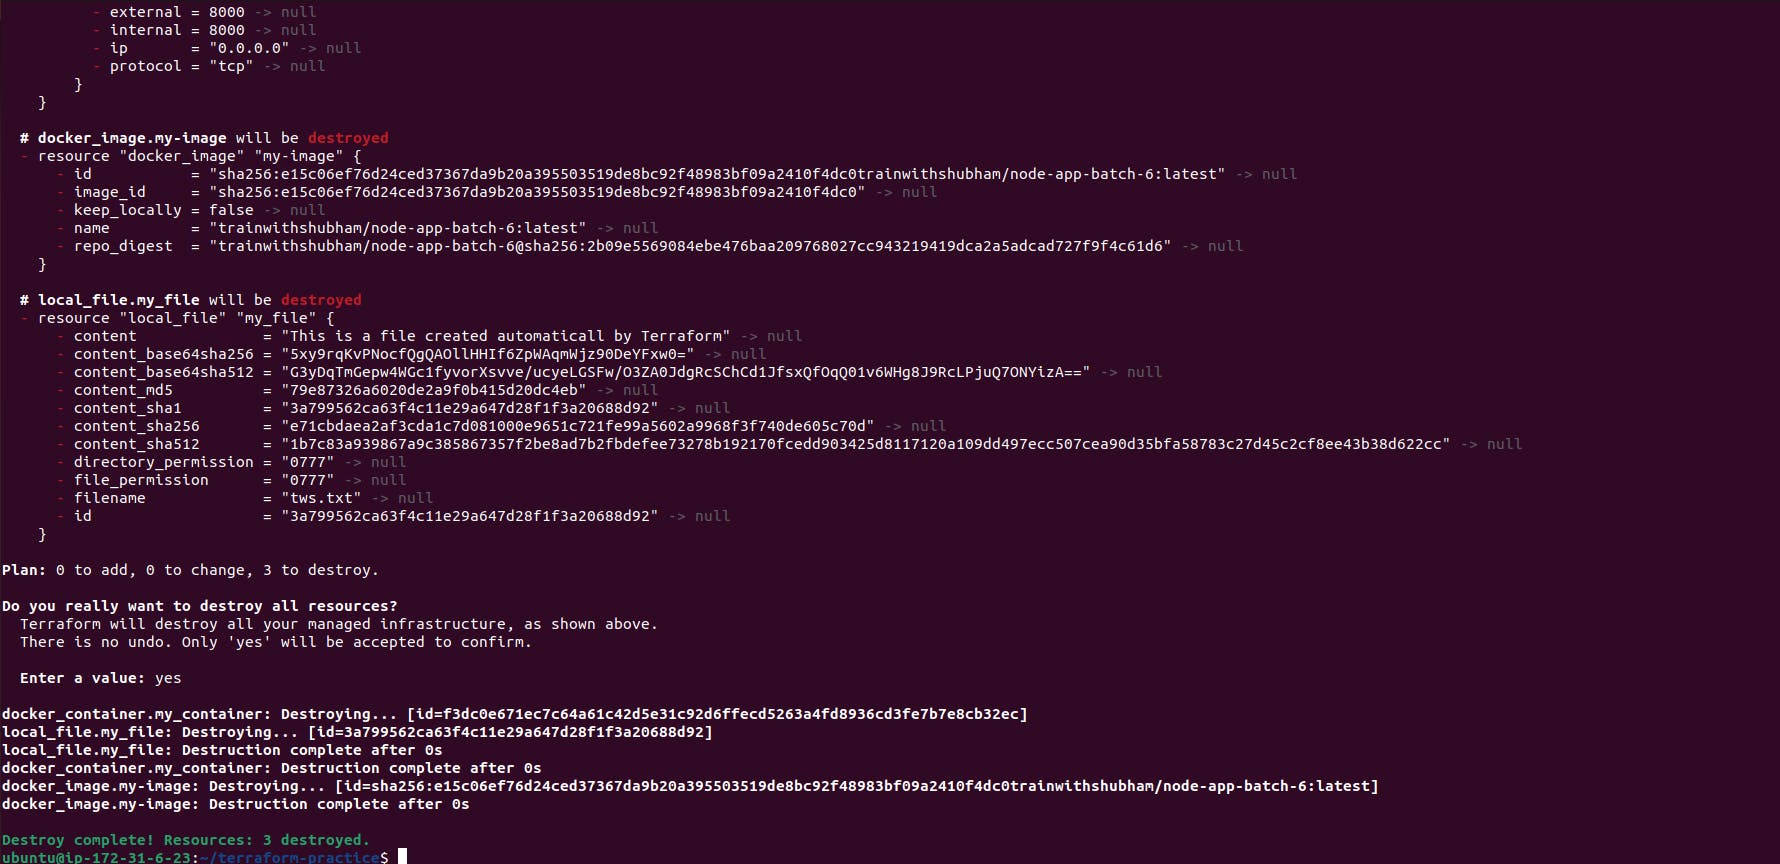
Confirm the destruction of resources when prompted. This command will remove all resources provisioned by Terraform, including Docker containers and images.
Setting Up AWS CLI, Creating S3 Bucket, and Access Key for Terraform
Installing AWS CLI v2 and Setting Up IAM User for Terraform
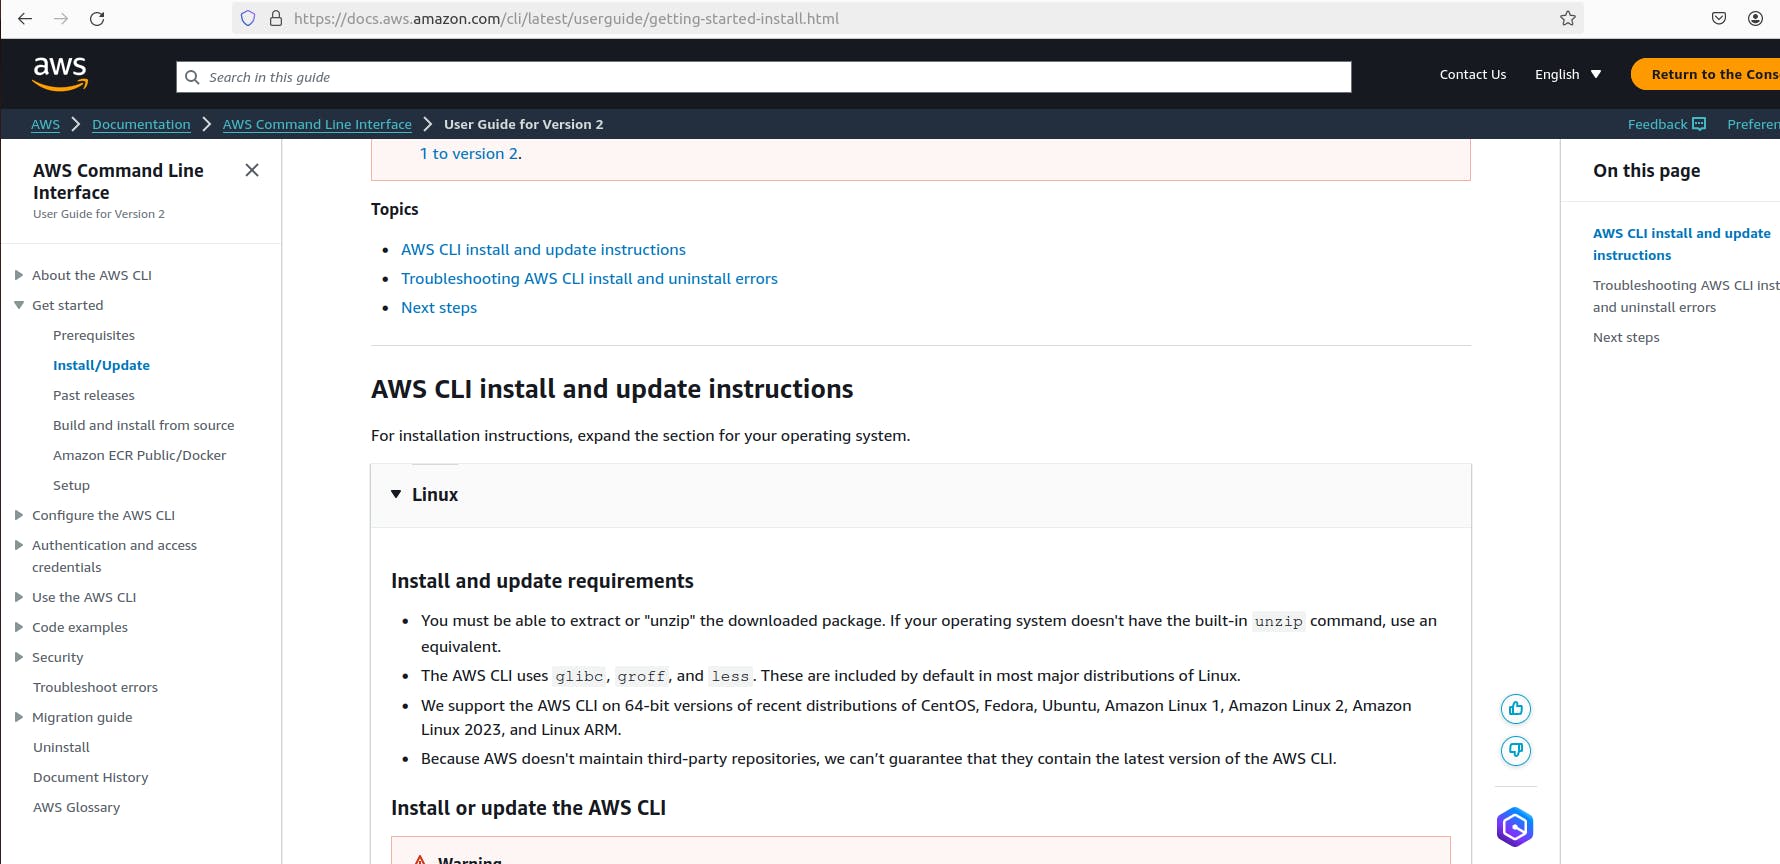
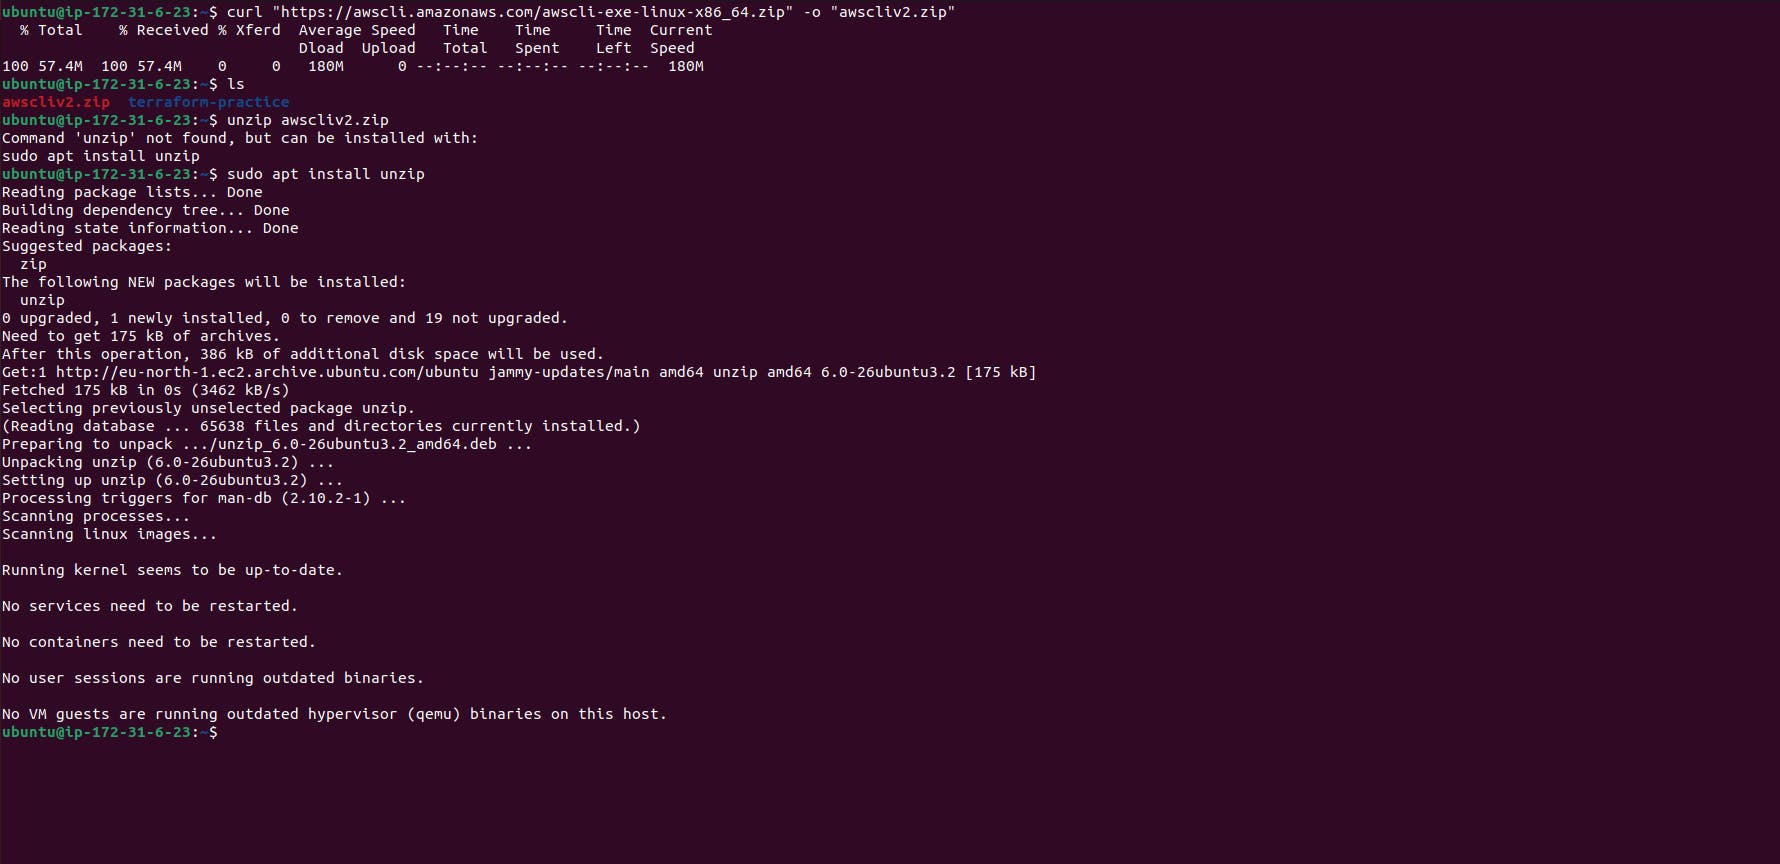
Install AWS CLI v2: Begin by installing AWS CLI v2 on your Linux system. Open a terminal and run the following commands:
 cd ..
 ls
 cd aws/
 ls
 cd ..
 sudo ./aws/install
This script will install the AWS CLI v2 on your system.
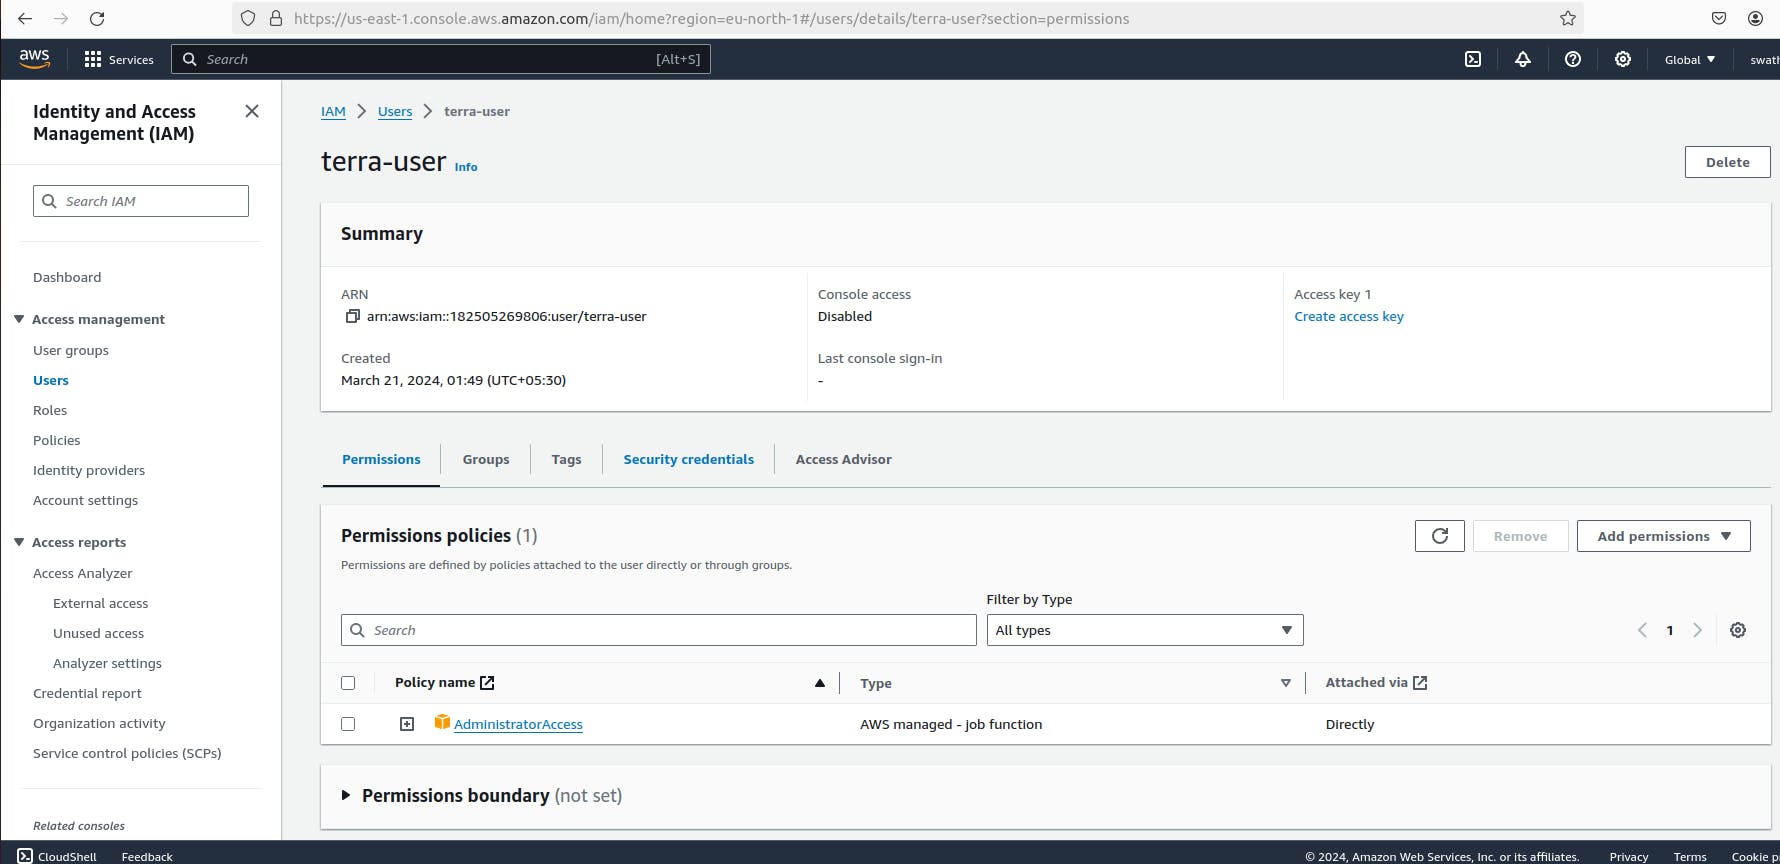
Create IAM User on AWS:
Log in to the AWS Management Console and navigate to the IAM (Identity and Access Management) service.

Click on "Users" in the sidebar and then on "Add user".
Enter a username (e.g.,
terra_user) and select "Programmatic access" as the access type.Attach policies directly by searching for "AdministratorAccess" and selecting it.
Proceed with the default settings until you reach the "Create user" page.

Click on the username and navigate to the "Security credentials" tab.

Create an access key, selecting "Command line" as the access type.
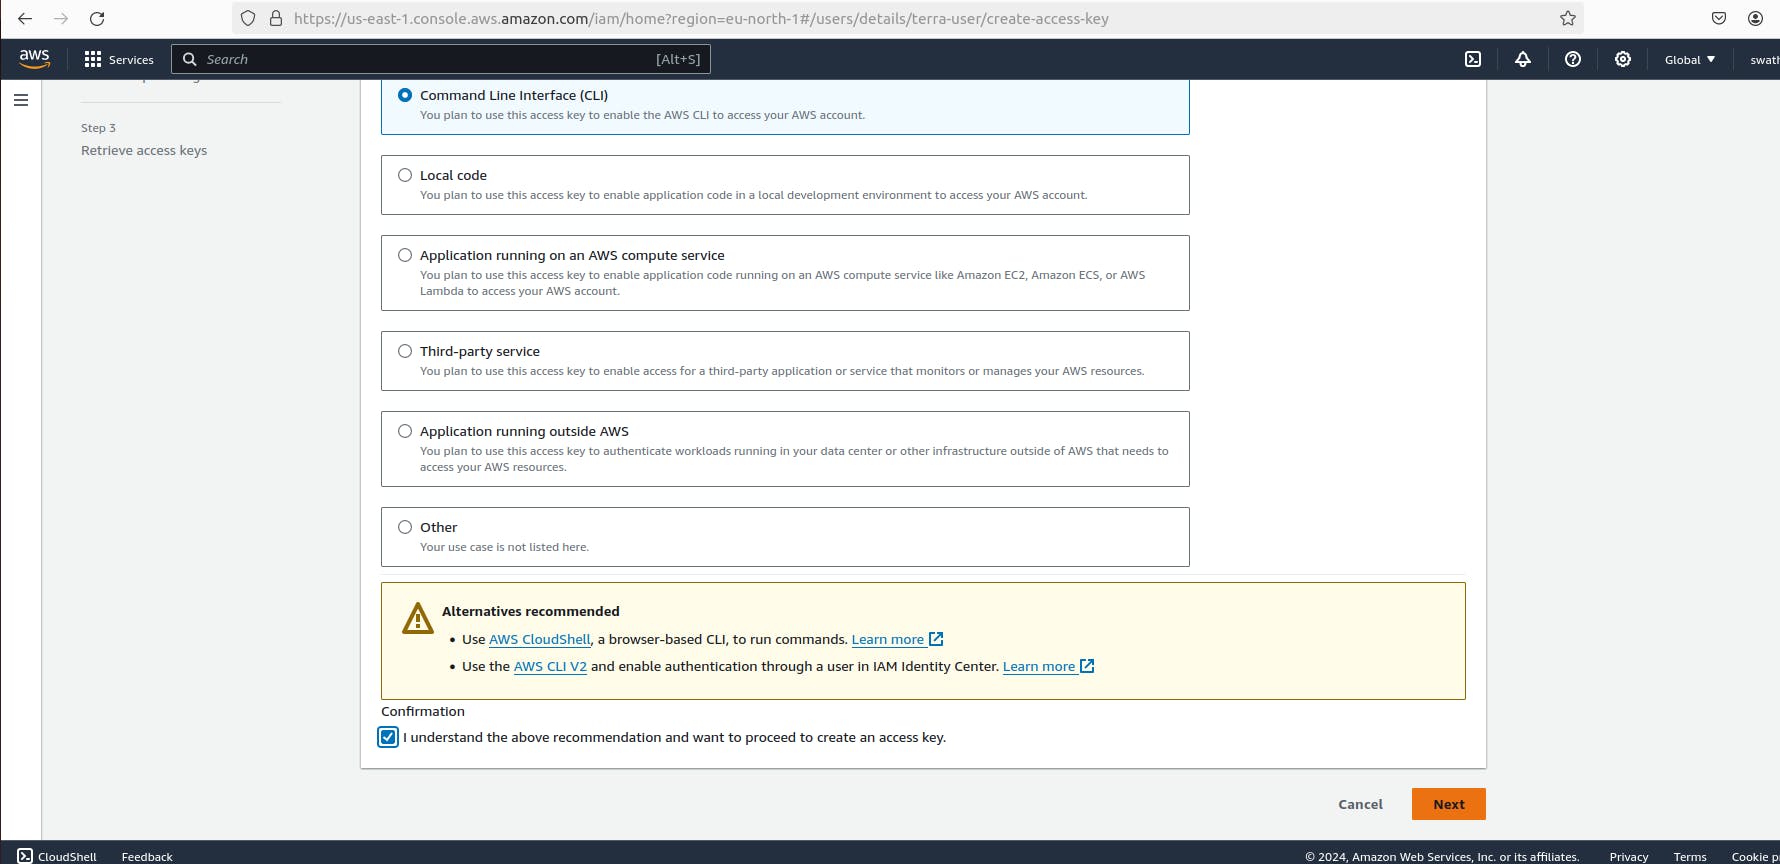
Click "I understand" and then "Download .csv" to save the access key details.
Configure AWS CLI: In your terminal, run the following command and provide the access key ID and secret access key when prompted:
aws configureFollow the prompts to enter the access key ID, secret access key, default region (e.g.,
us-east-1), and output format (e.g.,json).Verify AWS CLI Configuration: Confirm that the AWS CLI is configured correctly by listing your S3 buckets:
aws s3 lsPrepare Terraform Configuration: Navigate to your Terraform project directory (
terraform-practice) and create or edit theterraform.tffile to specify the required providers and their versions:terraform { required_providers { docker = { source = "kreuzwerker/docker" version = "3.2.0" } aws = { source = "hashicorp/aws" version = "5.41.0" } } } provider "docker" { # Configuration options for Docker provider } provider "aws" { region = "us-east-2" }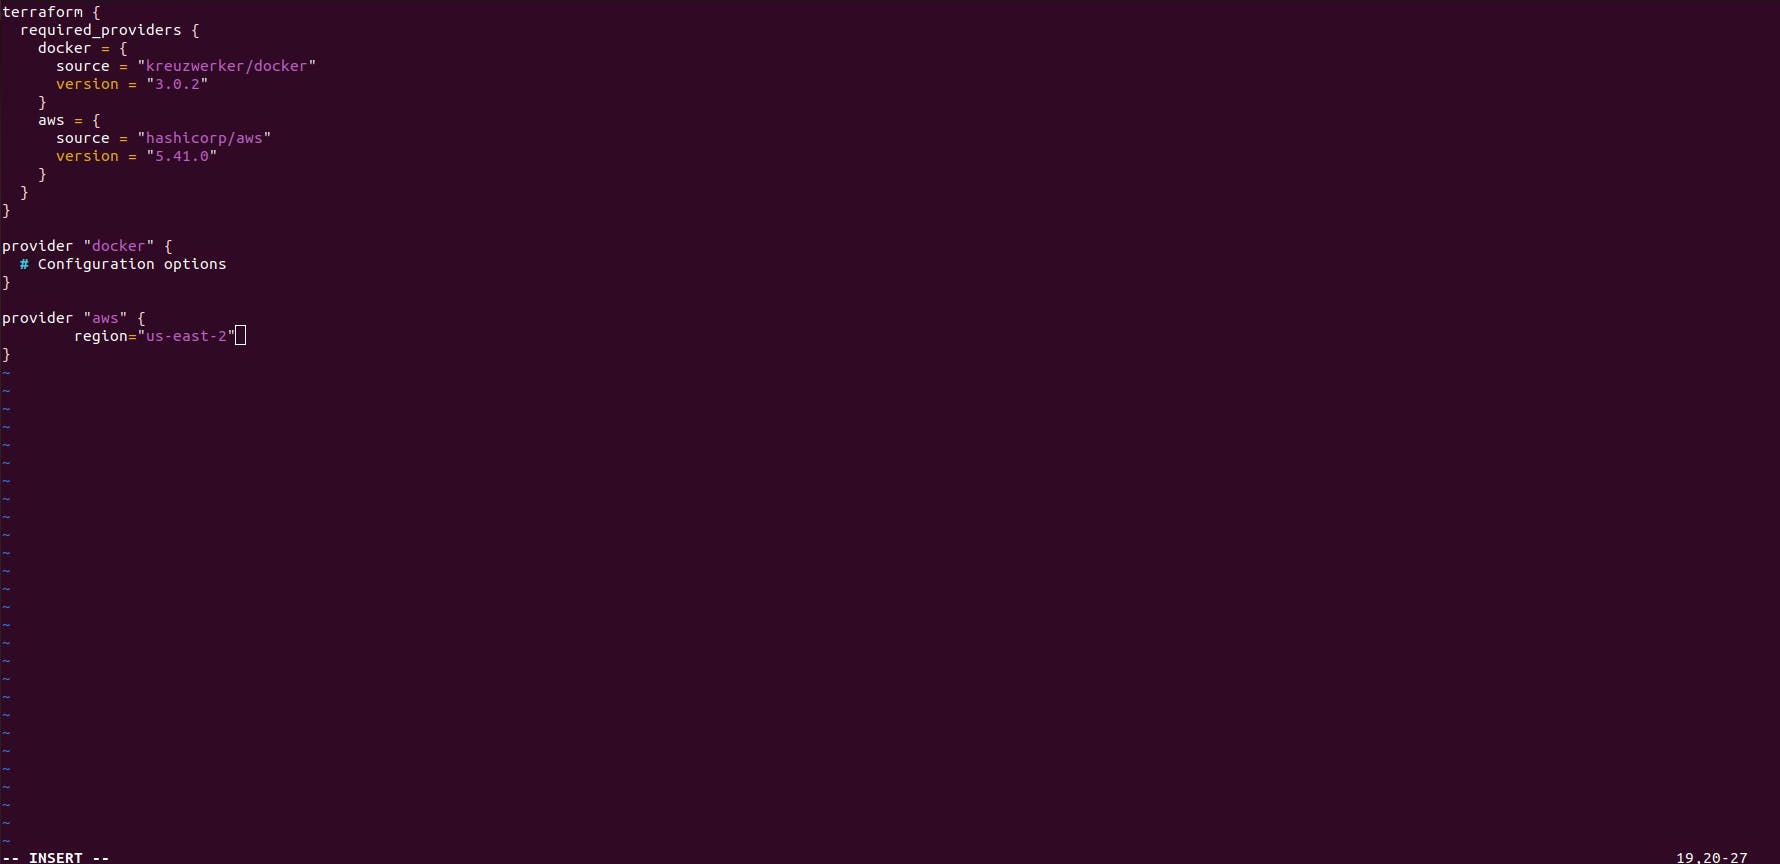
Define AWS S3 Bucket Resource: Create a Terraform configuration file (e.g.,
s3.tf) to define an AWS S3 bucket resource:resource "aws_s3_bucket" "my_bucket" { bucket = "devops-batch-6" tags = { Name = "devops-batch-6" } }
Apply Terraform Configuration: Apply the Terraform configuration to create the AWS S3 bucket:
 terraform plan
 terraform apply
Terraform will provision the specified AWS resources, including the S3 bucket, in your AWS account.
Verify S3 Bucket Creation: Confirm that the S3 bucket has been created by listing your S3 buckets:
aws s3 ls

By following these steps, you've successfully installed AWS CLI v2, created an IAM user with appropriate permissions, configured access keys, and created an S3 bucket using Terraform.
Conclusion
Terraform empowers you to streamline infrastructure management, automate deployments, and scale your infrastructure with ease. Whether you're provisioning cloud resources, managing Docker containers, or configuring AWS services, Terraform provides a unified approach to infrastructure automation.
With Terraform's declarative syntax and extensive provider ecosystem, you can confidently navigate the complexities of modern infrastructure. So, take the leap into infrastructure as code with Terraform, and revolutionize the way you manage your infrastructure!
Happy automating!